Thursday, July 29, 2010

Steaks, Mashed potatoes, Asparagus and Bacon Oh My!

So last night was clearing out the freezer night, therefore steaks were on the  menu!

I used Weber's Canadian Steak rub and made it into a marinade by mixing the rub with water, apple vinegar, and some olive oil. I put the steaks into ziplock bags and let them sit in the marinade in the fridge for about 4 hours.


The asparagus was prepared by "Wrapping" them with bacon and drizzling them with EVOO and lemon zest. The bacon will provide the salt and pepper flavor. The bacon we used was thick cut bacon and did not wrap very well so next time, a thin cut bacon should work better. Proscuitto is also an excellent option.

The potatoes were instant (gasp!) but they are actually very good and well, it saves time.

I also grilled some zuchinni from my Mother's garden. Topped them with some EVOO and salt and pepper.

I set up the grill for direct and indirect heating. When it was good and hot, I seared the steaks over the direct heat, about 2 minutes per side. I then moved them over to the indirect side to let them finish cooking. I used the "touch" method to determine when they were done (about 10 minutes later), pulled them off the grill and covered them to let them sit.


I then removed the grill grate and moved my charcoal around to the center in order to have an even heat all over. I also added a few more pieces of lump coal to make sure it stayed nice and hot for the veggie grilling. I then tossed on the pizza pan to let it heat up. When the pizza pan was hot, I tossed the asparagus on the pan and put the zucchini directly on the grill grate. Put the cover back on for about 5 minutes. I then turned the asparagus and bacon (the bacon was falling off the asparagus at this point). I let them cook for about another 10 minutes until the bacon was done.


Everything was very tasty...but also very peppery. I think next time we wont use peppered bacon and I will cut back a  little on the steak seasoning. The flavors were very good, just a tad strong for the over all meal.


Bon appetite!

Wednesday, July 21, 2010

Pork chops, peaches and corn on the cob

ast night I made some pork chops.

I rubbed them with some EVOO, chile powder, garlic powder and salt and pepper. The corn was coated with butter, salt and pepper and wrapped in tin foil. The peaches I just cut in half and grilled them.

It turned out ok, but I was expecting more heat from the rub on the pork.


Pulled Pork

Hello again....

This past weekend I attempted my first pulled pork. This was also my first time using my new Charbroil H2O Smoker that I picked up off craigslist.I made a couple modifications to it after reading up on the web the problems this particular smoker has. I extended the legs a little bit to raise it up. I also drilled some holes for my temperature probes to fit through.


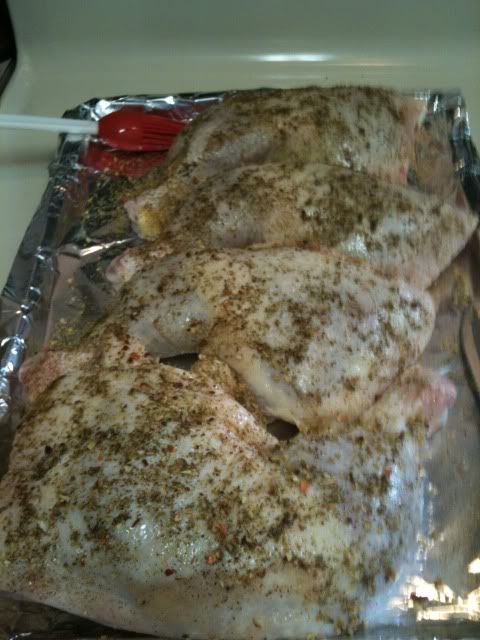
I planned to smoke the pork overnight since we wanted to have it for lunch on Sunday. On saturday I applied a rub to the pork butts and let them sit in the fridge until about 8:30pm. One of the butts also had dijon mustard in the rub, as I wanted to see how that affected the flavor.


I got the smoker going, using the minion method for charcoal. I filled the coal pan with unlit charcoal and then I 3/4 filled the chimney starter with coals and lit them. Once they were ready I put the lit coals on top of the unlit and let the smoker heat up. I filled the water pan with hot water and added a couple chunks of dry hickory.


When the smoker was ready, I put the butts on, one on each rack and put the temp probe in each one. I put the cover on and set my alarm. I wanted to check on the fire and temp after the first hour, and then every 2 hours after that. The internal temp of the smoker was right around 250.

At the one hour mark I checked my coals to make sure everything was going ok. I added a couple more coals and I spritzed the butts with some apple juice. Everything was looking good so far.

At the 3 hour mark I added a few more coals again since the fire was slowing down. The internal temp had dropped to around 200. I also added another hickory chunk as the others had burned off. I added a bit more water to the pan and gave the butts a spritz of juice.

At the 5th hour check, I started to see that the smoker was losing steam. The fire was just not staying hot and the ash was building up pretty good. I think this is one of the main flaws with this type of smoker. The ash buildup basically smothers the fire and restricts the air flow, therefore it is really difficult to go beyond the 5 hour mark for smoking. Adding more coals only helps so much if it cant get air to the fire. I also had forgotten about the automatic sprinkler in the yard and i don't think it helped the situation. While the sprinkler didnt go directly into the fire, I am sure it helped cool it down a bit.

At this point I realized that I needed to get the butts in  more heat in order for them to finish. So I lit up some coals again in my trusty weber kettle, I used the minion method again. Once that fire was good and ready and the grill was warm, I moved the butts over to the weber and let them finish there. They were on the weber for another 4 hours when they finally reached an internal temp of 180. They had a beautiful crust on them and smelled so good.


I pulled them off the weber and wrapped them in tin foil with some more apple juice. I then wrapped them in a towel and put them in a cooler to let them sit for a couple hours.

In the meantime, I had prepared a couple of "fatty's" for breakfast! A fatty is nothing more than pork sausage wrapped in bacon! I also added some potato, bell pepper, egg and cheese and stuffed the middle of the sausage. I let this sit in the weber smoking for about an hour and half. They turned out pretty good, maybe a tad too well done.


One of them split open on the grill so it was a little messy.

Well the pulled pork never really became pulled pork. I am not sure exactly why but I think we may have waited too long to try pulling the meat. The meat just wasn't tender enough to pull apart and it ended up being slice pork. If you have any suggestions as to why it wouldn't pull, please let me know.


It still tasted good sliced. With some home made coleslaw, bbq sauce and baked beans it made for a great lunch!

 Yum!

Until next time....

Friday, July 16, 2010

Pizza Pizza!

Last night was pizza night.

We had some Boboli pizza bread and added our favorite toppings, canadian bacon and pineapple and onto the grill they went!

The grill I wanted to get really hot so the pizza's would get nice and crispy. To do this I moved the bricks up on the cooking grate in order to support the pizza stone. I lit a chimney full of charcoal and once they were ready to go I spread them out evenly in the grill. I put the stone on and put the cover on to let everything heat up. While the stone was heating up I lit a second chimney (about 1/2 full of some lump charcoal...it was the end of a bag so I wanted to use it up...and when that was good and ready, I put those coals on top of the ones already in the kettle. I added some hickory to the coals for some flavor. This got the internal temp to about 550 with the cover on.

I loaded up the first pizza and covered it. After about 4-5minutes the cheese was all melted and the crust was a nice golden brown and crunchy. I pulled that pizza off and put on another. This one got a little more "done" then the previous pie due to the coals getting even hotter. By the time the 3rd pizza was put on, my thermometer was maxed at 600 and it was very hot. The third pizza got a little burned on the bottom of the crust, but not enough to ruin the pizza. Next time I will have to rmember that the grill gets hotter by the time the second and third pizza's get on the grill and therefore  I need to watch them closer.

Moom made a wilted green salad...it had bacon it it so you know it was good. I can't remember offhand how it was made so I will have to tell you later.

She also made a  "toscana" soup, which is a creamy potato soup with italian sausage in it and some greens. The sausage had a little kick to it and was very tasty.

Everything turned out ok, but I wouldn't say it was the best pizza I have had. I will have to work at it some more to perfect it. The salad was the star of this meal. Good job Mom!

Cheers,
Koopdaddy

Wednesday, July 14, 2010

Grilled Chicken Quarters and Quinoa

Tonight we made some grilled chicken

I put a no salt rub on the chicken and some evoo and let them sit in the fridge for about 2 hours. I setup my grill with the coals one side for some direct and indirect heating. When the kettle was good and hot (about 350) I put the legs directly over the coals to get a quick sear and grill marks. I think the grill was a bit too hot and I had to be quick moving the chicken over to the indirect side due to flare ups. I didn't want to char the meat.

I moved all the legs to the drumstick rack which holds them vertically, giving me more space on the grill...they were big cuts of meat. I covered the grill and let them cook for about 45 minutes, at which point I rotated the legs. After about an hour and 15 minutes I mopped some of my whiskey bbq sauce over the chicken and let that carmalize for a few minutes. I repeated this process another 2-3 times.

Unfortunately I wasn't able to get the chicken up to 160 degrees on the grill and had to nuke them for a few minutes to get them thoroughly cooked. I was pretty bummed about them not finishing on the grill. I have a feeling that they were not completely thawed in the middle and therefore it took longer to get the internal temperature up. Next time I will need to probably add a few coals to keep the heat going and extend the cooking time, or make sure the chicken is completely thawed.

The quinoa was cooked with some rosemary and dried cranberries. It makes for a nice alternative to rice and is healthy!


Tuesday, July 13, 2010

Bison Burgers, Corn on the Cob, and Sauteed Mushrooms

So last night I wanted to grill some burgers. I hadn't had a good burger in a while so it sounded like a good idea. I had been reading on various websites about burger recipes and came across some suggestions of using Bison meat instead of beef.

Bison has a lower fat content then ground beef and therefore some claim that it is a healthier meat to use for burgers, and tastes very similar to ground beef. The problem with less fat though, is that it cooks faster then ground beef and can "dry out" faster, so you have to watch your heat and length of time cooking with Bison.

I decided to give bison a try. I purchased 2lbs of ground bison, smoked gouda cheese, and some mushrooms. I added some worchester sauce, chopped green onion, garlic and onion powder, salt and pepper, an egg and some panko to the bison and mixed it all up. I formed the meat into balls and then flattened them into patties. I was able to make 7 patties from the meat. I did not measure them so I am sure that you can get more patties out of the 2 lbs if you want, but I wanted nice big juicy burgers. This aint McD's!

My lovely wife Mary Lou sauteed the mushrooms with some raspberry chipotle sauce and some pinot grigio. She did a marvelous job and they tasted fantastic!

She also prepped the corn on the cob while I was making the patties. She buttered the cobs and wrapped them in tin foil.

I setup my grill with the coals on one side, similar to how I would for smoking. I wanted to be able to grill some directly and indirectly. The direct heat temp was right around 350.

The patties went on first, over the direct heat. I wanted to sear them a bit and get a nice grill mark. I seared each side of the patties for about 2-3 minutes per side...with the kettle cover on. Once they were nice and brown, I moved the patties over to the indirect side of the grill to continue cooking, but not too fast.

I put the corn on the cob directly over the coals and let them start heating up. After a few minutes we could hear the corn "pop" every so often. During this time I added the gouda cheese to the burgers (one person requested provolone).

Once all the patties were done (about 10 minutes on indirect heat) and the cheese was nice and gooey, I pulled them off the grill. In the meantime I rotated the corn cobbs, and put the buns on the grill for toasting.

It ended up being a great meal. The burgers tasted great and weren't dry. The mushrooms were fabulous and the corn on the cobb was delicious.

Bison Burger pics

Koopdaddy

I have a new addiction

On July 4th, 2010 I smoked my first ribs.....and now I am addicted to smoking.

I recently purchased a Weber 22" kettle grill off craigslist and this is what I used to smoke the ribs. If you are unfamiliar with the smoking process, just remember this: low and slow. Keep the temperature low and let your ribs or brisket cook for a long time (ie 4-15 hours). If you have ever used a kettle grill before you know that they get very hot and stay hot for a while, so in order to do low and slow we need to control the temp and cook the meat indirectly, or they will overcook.

So this is what I did to make a smoker out of the Weber

I wrapped some fire bricks with tin foil and used them to keep the charcoal on one side of the grill. I then dumped about 1 full chimney full of lump (I used Royal Oak charcoal) of unlit charcoal in the weber. After that I filled the chimney started again, about halfway and lit those.

I also wrapped some tin foil over the bricks and over the charcoal area of the kettle, in order to help control the heat a little. This helps protect the flame from flaring should any drippings get near the fire.

I put a pan of water underneath the area where the ribs would be. This helps keep it moist inside the kettle as well as control the heat.

After the lit coals were good and ready, I dumped those onto the unlit coals. This is also known as the "Minion Method". I put the kettle cover back on and let it heat up real good. I wanted a temperature of right around 225-250.

Once it was hot enough, I put the ribs on a rack to hold them upright. This helps them cook evenly and also gave me more room to fit all 3 rib racks. Once I had them on the grill, I added some apple wood to the fire for my smoke. I put the lid on and left them alone for an hour. After one hour I stoked my coals and added a few more lumps just to make sure the fire kept going. I also applied a mop to the ribs to keep them most. The mop was just a mix of apple juice, apple cider vinegar and some worchester....same base as my BBQ sauce. You want it "watery" and not thick like a sauce, otherwise it will just burn and char.

After that I let them smoke for another hour and a half or so, at which point I pulled the ribs off the grill. I moped the ribs again with the sauce, and then wrapped each one in tin foil, adding a touch of apple juice inside the foil. After they were all wrapped I put them back on the grill, added a few more charcoal and closed it back up. I also rotated the ribs around since some were closer to the fire then others, I wanted them to cook evenly.

I left the ribs in the foil for about an hour and a half. I pulled the tinfoil off the ribs and put them back on the grill and I basted on my bbq sauce. Close the lid for about 4 minutes, then I flipped the ribs and added more sauce. I repeated this process about 3 times.

I pulled the ribs off the grill after about 5 hours of cook time. They smelled so good I had to taste one and what a delight that was. The meat was not quite falling off the bone, but it was very tender.

I loved my first venture into smoking and I can't wait to do it again.

Slide Show

Until next time,
Koopdaddy

And so it begins!

Weclome to the Koopdaddy BBQ blog.

Let the good times and good eats begin!